25.06.01
Introduction
We have rolled out a patch for our shipping software – PIYOVI version v25.06.01. Below, you will find the release topics and details.
1. Rate Shop Rules
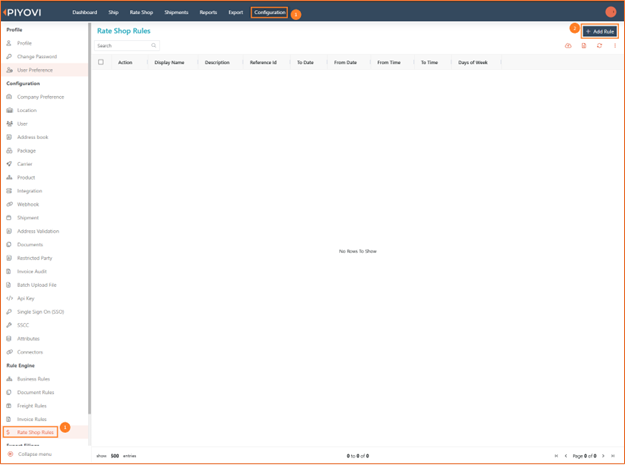
We have extended the Rate Shop Rules module to allow users to control the rate shopping based on the criteria. This enhancement aligns the Rate Shop module with the capabilities available in Business and Freight Rules, providing more granular control over rate selection.
Steps to Configure Rate Shop Rules
-
Navigate to Configuration > Rule Engine > Rate Shop Rules
-
Click + Add Rule (top-right).
-
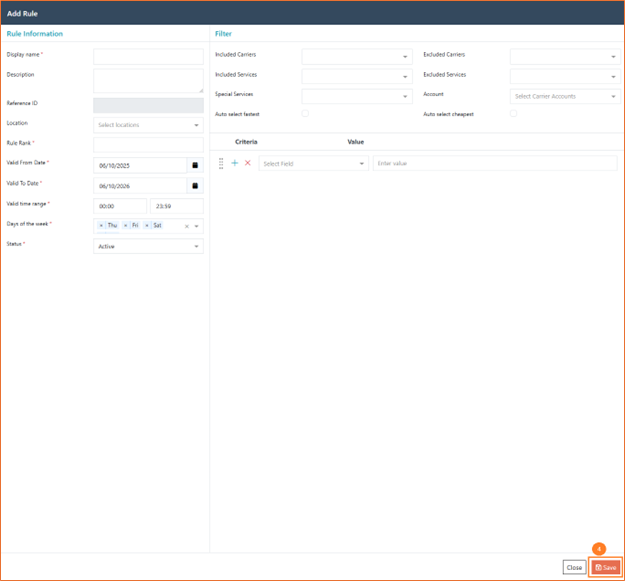
Define rule conditions and logic.
-
Save the rule.
This update enables shippers to fine-tune carrier selection logic and streamline their rate shopping workflow with enhanced flexibility and control.
2. Differentiation for Generic and Integrated Carriers
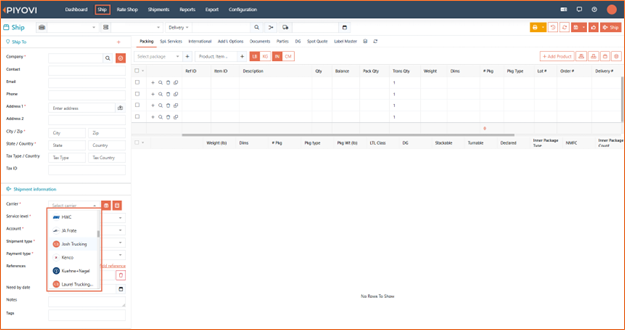
We have added distinct icons for Generic Carriers and Integrated Carriers to make them easy to recognize wherever they appear in the application. Users can immediately see whether a carrier is generic or integrated, reducing selection mistakes.
-
Ship screen – The carrier dropdown now displays each carrier’s icon, matching the icon on the Carrier configuration page.
-
Shipment screen – Grid view shows icons in the carrier column, giving users an immediate visual cue about the carrier type.
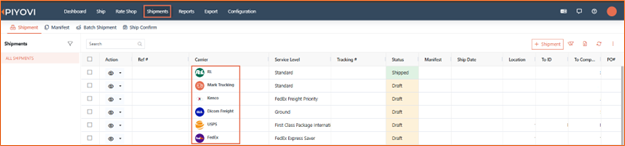
No additional configuration is required—icons appear automatically wherever carriers are listed.
3. FedEx IPD Implementation
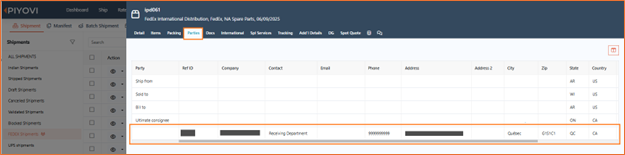
We have introduced FedEx International Priority Distribution (IPD) service, which is a consolidated international shipping service designed for customers who ship multiple packages to multiple recipients within a single destination country.
Steps to Use FedEx IPD
-
Go to the Ship screen.
-
Select the FedEx carrier and choose the FedEx International Priority Distribution service level.
-
Process the shipment. Once processed, port details will be visible under the Parties tab.
-
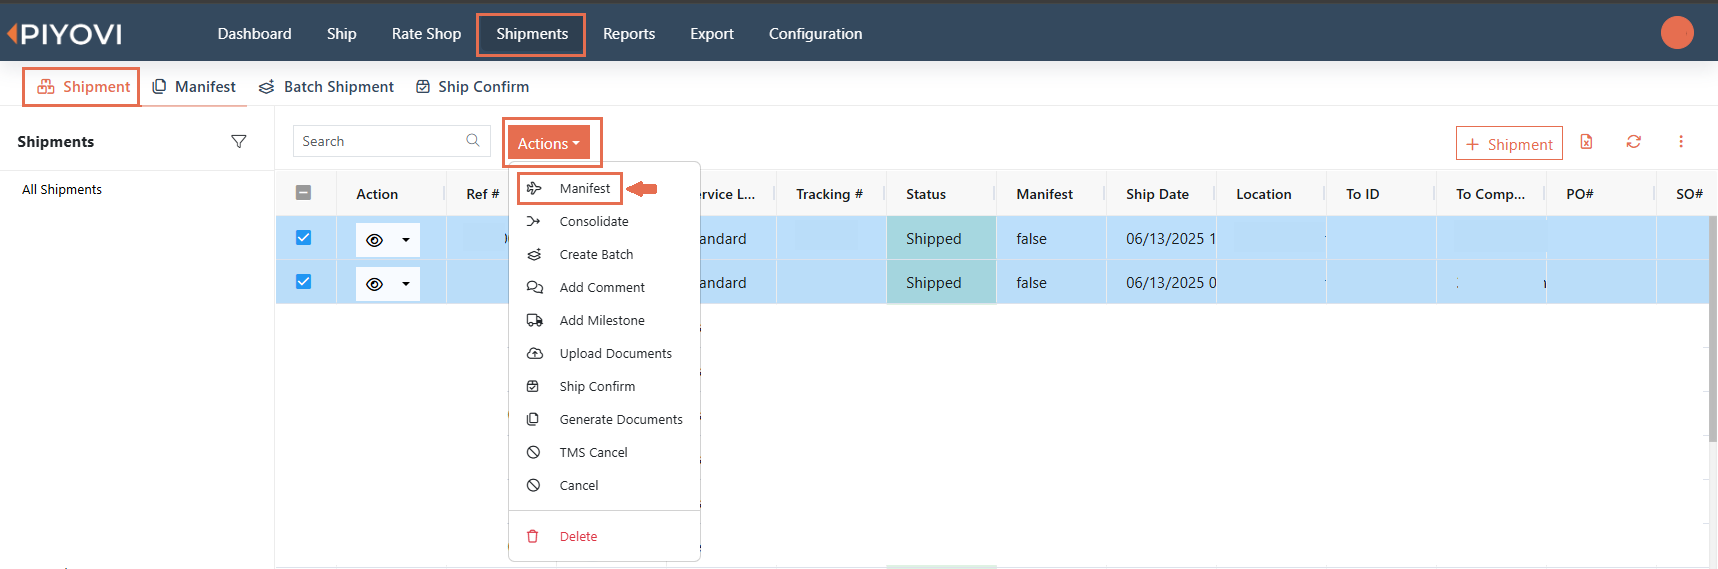
Since FedEx IPD requires an End-of-Day (EOD) process, navigate to the Shipment screen to perform the manifest operation
-
Select the shipments that need to be manifested. Click on the Actions button (located beside the search bar) and choose Manifest from the dropdown.
-
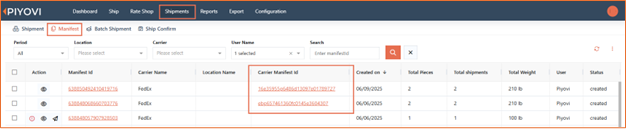
Go to the manifest Tab.
-
Go to the Manifest ID, click on the Carrier Manifest ID to access the post manifested carrier documents.
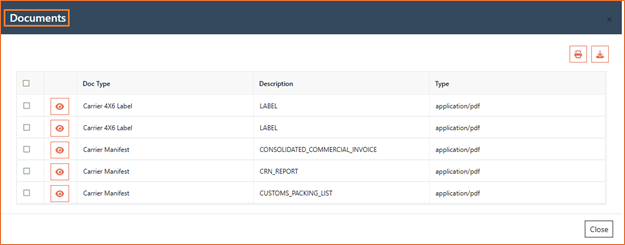
Sample CRN document
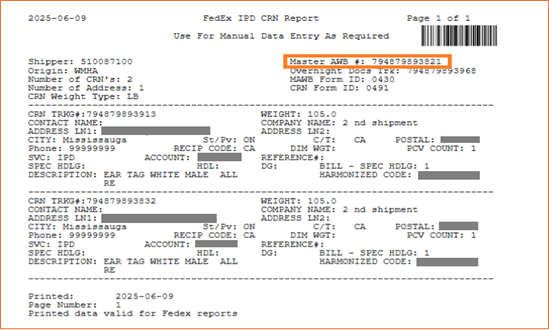
Note: If documents are not available immediately, click on Regenerate Documents ![]() . Once regenerated, we can able to view and download documents in the Carrier Manifest ID.
. Once regenerated, we can able to view and download documents in the Carrier Manifest ID.
4. Return Shipment Enhancement
Now Piyovi supports the return shipments along with outbound shipments. Note: Currently the return shipment can be performed by using the same carrier as used for outbound shipment.
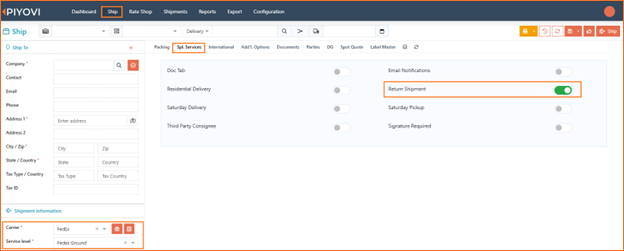
Introduced a dedicated Return Shipment tab in Ship screen.

Steps to Use
-
Navigate to the Ship and select the desired Carrier and Service Level.
-
Under Special Services, choose Return Shipment.
-
Go to the Return Shipment section
 , fill in the required details:
-
Carrier
-
Service Level
-
Account
-
Type
-
Return Shipment Type
-
Click Ship to proceed.
-
You can view and download both labels from the Documents tab on the Shipment View screen.
(Note: Return label will include the word "Return" clearly printed on it for easy identification)

5. Shipment – Add Notes Field to Business Rules
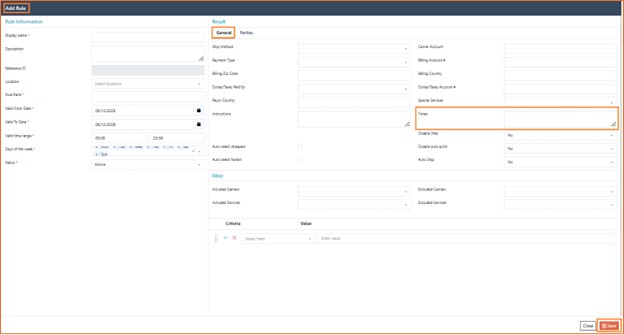
We have introduced a new Notes field to the Business Rules configuration screen. This enhancement allows users to define shipment-specific notes at the rule level, which will automatically populate the Notes section on the Shipment Information screen.
This feature reduces manual entry and ensures that consistent shipping instructions are applied based on predefined business logic.
Steps to Use
Follow these steps to configure and use the Shipping Instructions field:
To Add Instructions in Business Rules:
-
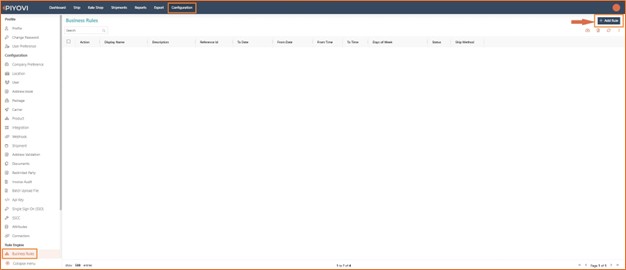
Go to Configuration > Rule Engine > Business Rules.
-
Click Add Rule or Edit a previously created rule.
-
In the Result > General section, enter the shipping instruction in the new Notes field.
-
Define your rule conditions (location, carrier, time range, etc.) and click Save.
To View Auto-Populated Notes in Shipment:
-
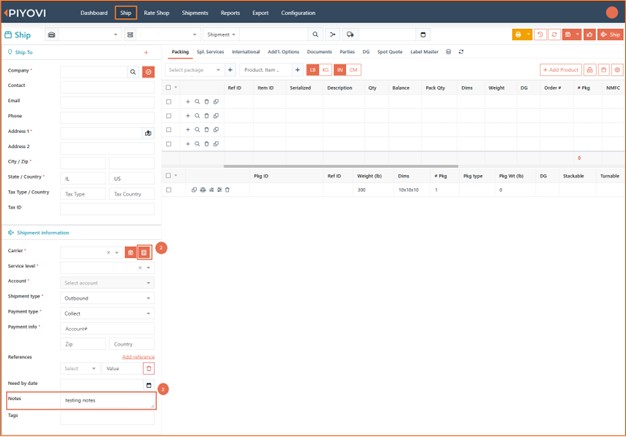
Navigate to Ship > Create Shipment.
-
Enter details that match the saved business rule conditions. Click on Apply Rule.
-
The Notes field in the shipment form will be automatically filled with the configured instruction.
6. Invoice Audit Report – Edit Payable Amount at Line Item Level
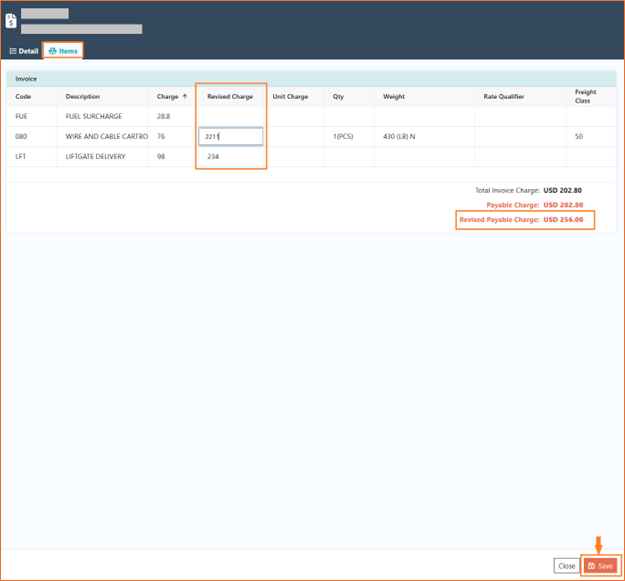
We have enhanced the Invoice Audit Report module in TMS to allow users to manage Payable Charges at a more detailed level. A new Revised Charge column has been added next to the Charge column for each line item. This field is editable, giving users better control over individual charges.
With this update, users can now directly edit the payable amount for each line item for invoices in Pending, Approved, or Rejected status. This feature is not available for Posted invoices.
Steps to Use
Follow these steps to edit payable amounts at the line item level:
-
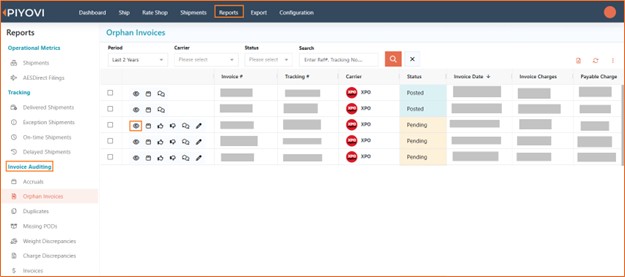
Go to the Reports tab.
-
Under Invoice Auditing, select the relevant report section (e.g., Orphan Invoices).
-
Identify an invoice with status Pending, Approved, or Rejected.
Note: Editing is not available for Posted invoices.
-
Click the View icon (eye symbol) next to the invoice.
-
A new pop-up window will open. Navigate to the Items tab.
-
Locate the Revised Charge column next to the original Charge column.
-
Enter or modify the Revised Charge for each applicable line item.
-
At the bottom of the screen, confirm the updated totals:
- Total Invoice Charge
- Payable Charge
- Revised Payable Charge
-
Click on Save.